
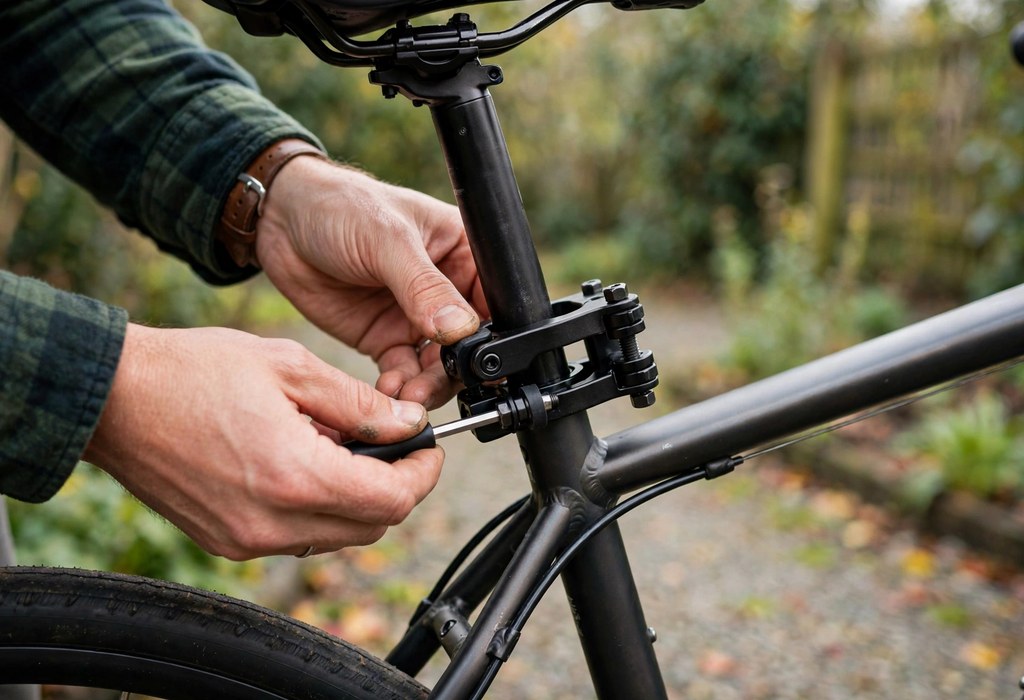
Clamp the mounting bracket of your baby bike seat to the seat tube or rear rack. Next, tighten every bolt to the specified torque and shake the seat firmly before your first ride.
Feeling nervous about this installation is completely natural, and that instinct serves you well. Therefore take your time, read carefully, and follow each step in order.
A frame-mounted seat clamps directly onto the bicycle frame for a lower center of gravity. In contrast, a rack-mounted version bolts onto a rear luggage carrier and adds a backup safety strap.
This guide walks you through both systems step by step. Inside, you will also learn torque rules, bolt checks, and a simple stability test.
Know Your Mounting System
Inspect the frame shape, tube diameter, and existing rack before you buy. Moreover, run a quick baby bike seat compatibility check against the manufacturer’s fit list.
Frame-Mounted Seats
With a frame-mounted seat, a steel bracket connects the seat to the seat tube. Consequently, the seat sits low and close to your center of gravity.
These models fit round frame tubes between 28 and 40 millimeters. Also check the weight limit, since most models cap at 22 kilograms. Before buying, review the baby bike seat safety guidelines for full requirements.
Rack-Mounted Seats
You can fasten this seat type to a standard rear luggage carrier. Afterward, a separate strap wraps around the frame as backup.
Such systems suit bikes that already carry a sturdy rear rack. Still, ensure the carrier spans no more than 175 millimeters wide.
Prepare Your Bike and Tools
First, clean the seat tube or rear rack with a dry cloth. Dirt and grease reduce clamp grip and invite dangerous slipping. Collect every tool the manual lists.
- Hex keys: first, confirm your set includes 4, 5, and 6 millimeter sizes.
- Torque wrench: also grab this tool to verify tightness in Newton meters.
- Phillips screwdriver: some clamps also include Phillips head screws.
- Soft cloth: first, place one under the bracket to protect the paint.
Lay out every bracket, bolt, washer, and strap on a table. Missing hardware causes dangerous shortcuts, so inventory everything now. Finally, read the manufacturer manual from cover to cover.
Install a Frame-Mounted Seat
To begin, position the mounting bracket around the seat tube just below your saddle. Keep it high enough that the seat clears the rear wheel during flex.
Following that, insert the bolts through the bracket jaws and add the washers. Tighten each bolt evenly in small turns to balance the pressure.
- Seat height: first, mount the seat as close to the saddle as possible.
- Recline angle: then set a slight backward tilt so your child cannot slide.
- Clearance check: finally, press the seat down and confirm nothing touches the wheel.
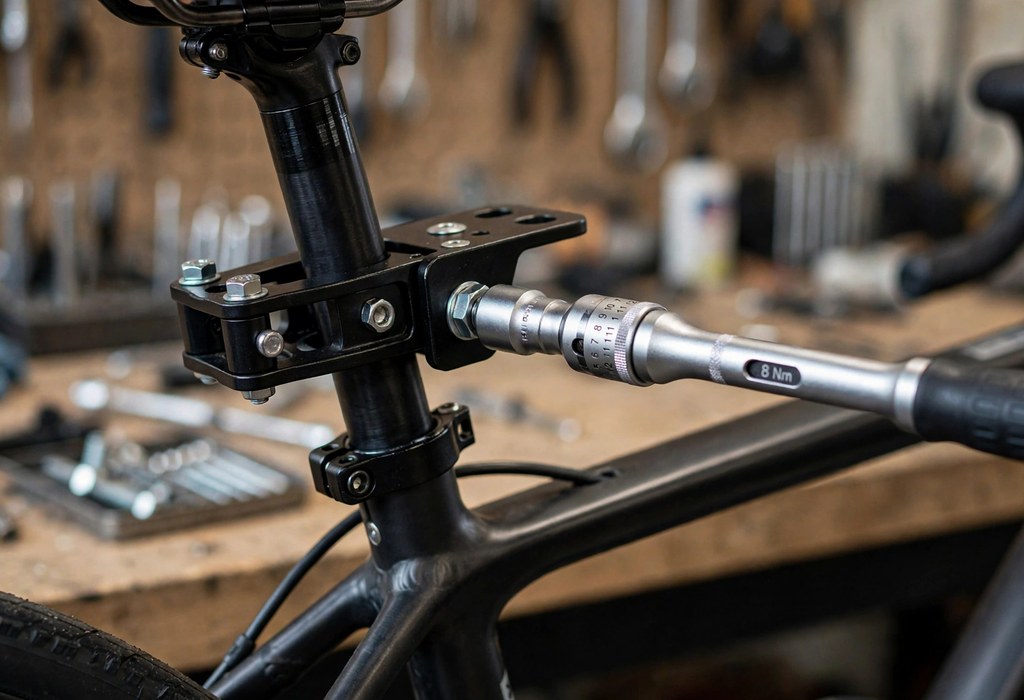
Bring the bracket to at least 8 Newton meters unless the manual says more. Recheck the torque after a short test ride, because new brackets can settle.
Install a Rack-Mounted Seat
Second, set the seat base onto the rear rack rails and center it. Its center of gravity should sit between the front and rear axles.
Drive the four screws through the base and into the rack. After that, clip the spoke guard between the seat and the rear wheel.
- Screw order: first, tighten screws in a diagonal sequence for even pressure.
- Backup strap: next, loop the safety strap around the frame and buckle it.
- Footrests: finally, attach them so little feet stay clear of moving parts.
Once aligned, pull the backup strap tight and lock its buckle behind the seat. Shake the base side to side and confirm zero movement. If the rack itself flexes, reinforce it before anyone rides.
Bolt Torque and Safety Checks
Simply put, torque means how tightly you twist each bolt. Too little torque lets the bracket slip during a ride.
Dial your torque wrench to the manual’s value, often 8 Newton meters minimum. Stop the moment the wrench clicks.
Examine every bolt before each ride for the first month. Vibration loosens hardware faster than most parents expect.
Perform the Stability Test
Begin by standing beside the bike and gripping the seat with both hands. Push it forward, backward, and side to side with firm force. The whole bicycle should move as one unit, never the seat alone.
Now bounce the rear of the bike while watching the bracket. Any sliding, creaking, or rotation means something needs tightening.
Sit on the saddle and pedal slowly around a quiet street without your child. Notice how steering and braking respond with the added weight.
Buckle and Adjust the Harness
Even a correctly installed seat still needs a correctly secured child. Thread the 5-point harness over both shoulders, around the waist, and between the legs. Snug each strap so only one finger fits underneath.
Adjust the shoulder straps to sit level with your child’s shoulders. Lower the footrests so little legs rest without dangling.
Confirm the buckle clicks audibly and resists a firm tug. Make sure the helmet stays level and its straps form a snug V.
Common Installation Mistakes
Many installations fail for the same avoidable reasons. Learn them now and you will skip the frustration.
- Skipping the manual: instead, read it fully, since every bracket differs.
- Ignoring torque specs: hand-tight bolts loosen, while overtightened bolts damage frames.
- Forgetting the backup strap: still, many riders skip that second attachment.
- Clamping carbon tubes: instead, choose a steel or aluminum frame.
- Blocking brakes or cables: otherwise, braking or shifting could fail.
Frequently Asked Questions
What torque should the mounting bracket reach?
Start by tightening the bracket to the specified torque, then confirm the seat stays put when shaken.
Can I install a baby bike seat on any bicycle?
Most standard bikes accept one; however, carbon frames and rear suspension models need a different solution.
Which test confirms the seat is stable enough?
Give the mounted seat a hard shake; when the whole bicycle moves as one unit, it passes.
Should I use a torque wrench for installation?
Yes, a torque wrench delivers the exact tightness the manual requires and therefore prevents hardware damage.
When should I recheck the bolts?
Go over every bolt before each ride for the first month, then monthly and after hard bumps.
Conclusion
Careful installation turns family rides into pure enjoyment. Respect the torque specs and test stability before every ride.
Ready to ride? Gather your tools this weekend and follow this guide step by step. Then share it with another cycling parent who needs the same confidence.