
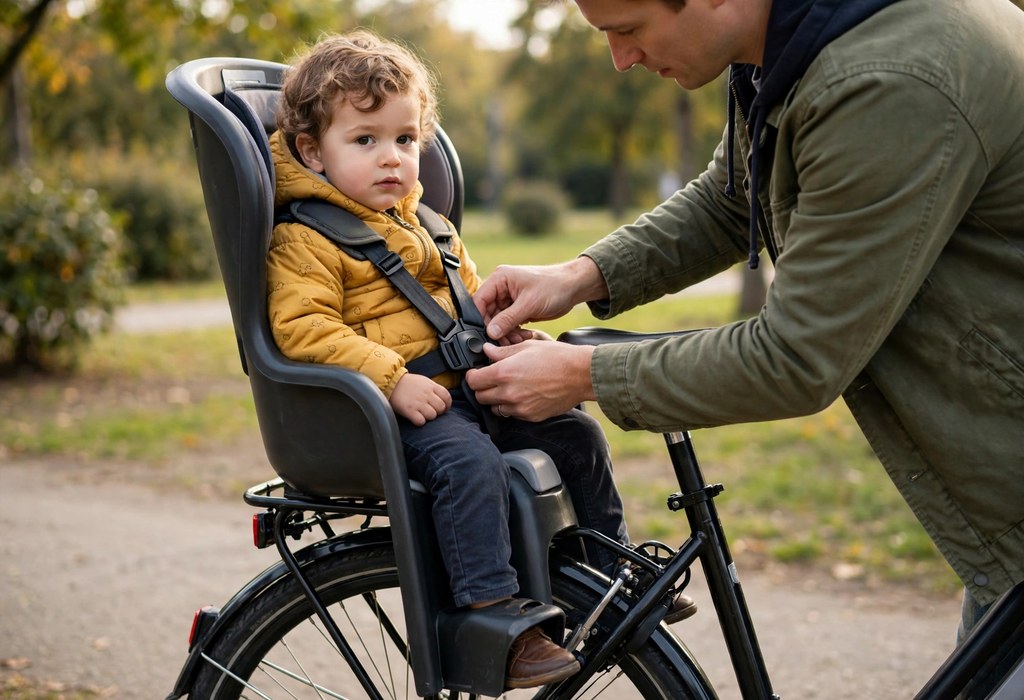
Securing a child in a baby bike seat starts with a snug 5-point harness. Fasten it over both shoulders, both hips, and between the legs. Then strap the feet to adjustable footrests and confirm the spoke guard. Finally, run the pre-ride tug test before every single ride.
Fit matters more than the seat model itself. Loose straps allow dangerous movement during sudden stops or sharp turns. Therefore, treat every ride like the first one and recheck the setup. Additionally, harness settings drift as your child grows, so adjust them monthly.
The walkthrough below covers each securing step in plain detail. For broader rules, review the baby bike seat safety guidelines before your first outing.
Prepare the Bike Before Loading Your Child
Park the bike on flat, level ground and set the kickstand firmly. Instead, lean the frame against a sturdy wall for extra stability. Hold the handlebar with one hand while lowering your child in. Never rush this step because most tip-overs happen during loading.
First, loosen the harness straps fully before placing your child in the seat. Also, open straps make loading faster and reduce wriggling. Afterward, seat your child deeply against the backrest before touching any adjuster.
Understand the 5-Point Harness
Five contact points define the harness: both shoulders, both hips, and between the legs. That layout spreads force evenly across the torso during sudden stops. Because of this spread, your child cannot slide out even while leaning or wiggling. Simple lap belts cannot match this protection.
Position the Shoulder Straps and Pads
Shoulder straps should lie flat across the collarbone, never slipping off the shoulders. Keep them clear of the neck so they cannot chafe or press. Furthermore, padded covers add comfort on longer rides and prevent rubbing. As your child grows taller, raise the strap slots at the back.
Set the Hip Straps and Crotch Buckle
Hip straps belong low across the thighs, never riding up onto the belly. Next, click the center buckle into the crotch strap between the legs. Press firmly until you hear a solid click. Toddlers master buckles fast, so pick a child-resistant design.
Dial In Harness Snugness
Snugness decides whether the harness truly protects your child. Slide two fingers between the strap and your child’s chest as a quick test. This quick check takes seconds yet reveals hidden slack instantly.
Perform the Pinch Test
Try pinching the shoulder strap webbing vertically at the collarbone. If you gather any fabric, tighten the adjuster tail downward. Settle your child deeper into the seat, then test again. Repeat the check whenever you change clothing layers.
Use this strap checklist after every adjustment:
- Shoulders: lie flat with zero twists or slack
- Hips: sit low across the thighs, away from the belly
- Crotch strap: feels firm without pressing into the skin
- Buckle: clicks loudly and survives a hard pull
Lock the Feet with Footrests and Straps
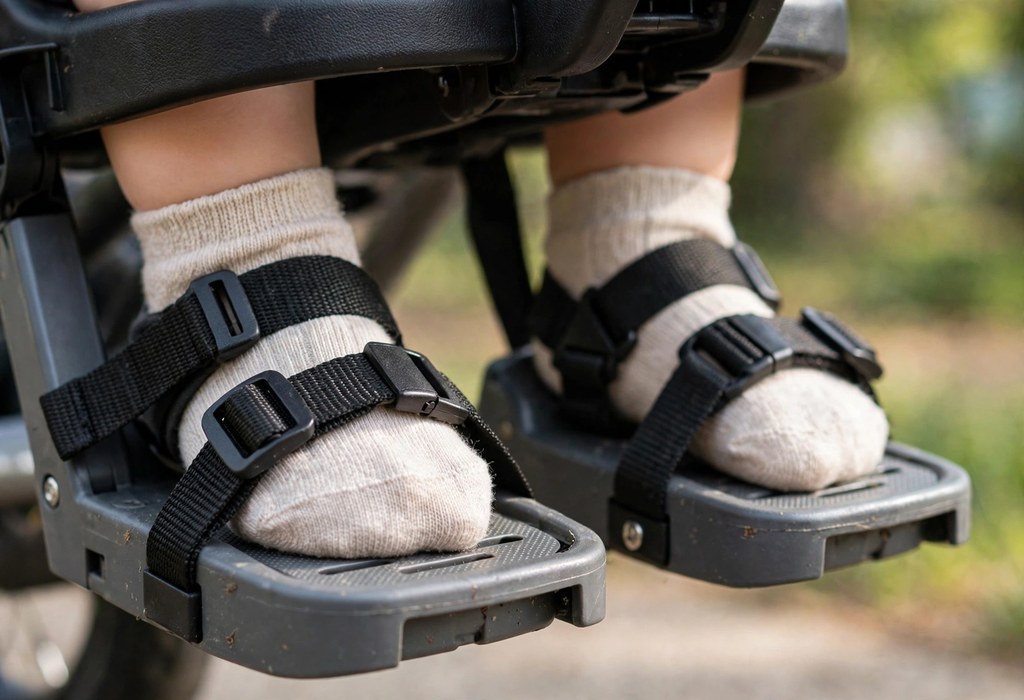
Dangling feet can drift into spinning spokes and cause severe injuries. Adjustable footrests hold the legs at a safe height and angle. Foot straps then lock each shoe firmly onto its rest.
Move the footrest up as your child grows so the knees bend slightly. Tighten each foot strap over the shoe without squeezing the foot. During the ride, glance down at every stop and confirm both shoes stay strapped. While you secure the lower body, also review bike helmet fit for babies and toddlers.
Verify the Spoke Guard
Spoke guards are rigid shields that block little feet from the wheel. Every guard sits between the footrest and the rear wheel on most models. Even with strapped feet, the guard supplies vital backup protection. Before pedaling, check both sides for complete coverage.
Run the Pre-Ride Tug Test
Ideally, the pre-ride check takes under a minute and catches most fitting errors. Each time, follow the same order so no step gets skipped.
Run these tug test steps in order:
- Harness: tug each shoulder strap upward firmly
- Buckle: yank the center buckle hard to confirm the lock
- Foot straps: lift each foot slightly to test strap grip
- Seat mount: rock the seat side to side for stability
- Helmet: check the chin strap sits snug under the chin
Fix anything loose before you start pedaling. Over time, a steady routine teaches your child to sit still for the check. Correct mounting matters just as much, so study installing a baby bike seat before your first ride.
Avoid Common Securing Mistakes
Bulky jackets create hidden slack because the padding compresses during the ride. Remove puffy coats and drape a blanket over the secured harness instead. Recheck the straps after ten minutes since active toddlers loosen them. Lastly, never leave a strapped child alone on a parked bike.
Skipping the foot straps ranks among the most dangerous shortcuts parents take. Children’s legs swing naturally, so unstrapped shoes reach the spokes quickly. Ultimately, strapping takes seconds and prevents the most common bike seat injury.
Frequently Asked Questions
How tight should a baby bike seat harness be?
It should feel snug enough that only two fingers fit between the strap and the chest.
Should my child wear foot straps in the bike seat?
Yes, foot straps keep shoes on the footrests and stop feet from reaching the spinning spokes.
What does a spoke guard do on a baby bike seat?
Its rigid barrier blocks the child’s feet and hands from touching the wheel spokes.
How do I know the buckle is toddler-proof?
Choose a child-resistant buckle that clicks firmly and resists small fingers trying to open it.
Should I recheck the harness during a ride?
Absolutely, stop after ten minutes and recheck snugness because active toddlers loosen straps.
Conclusion
Proper securing turns every ride into a safe family adventure. Together, the snug 5-point harness, locked foot straps, and verified spoke guard work as one system. Consequently, run the pre-ride tug test every single time you ride. Explore our full safety hub today and plan your next ride with total confidence!