
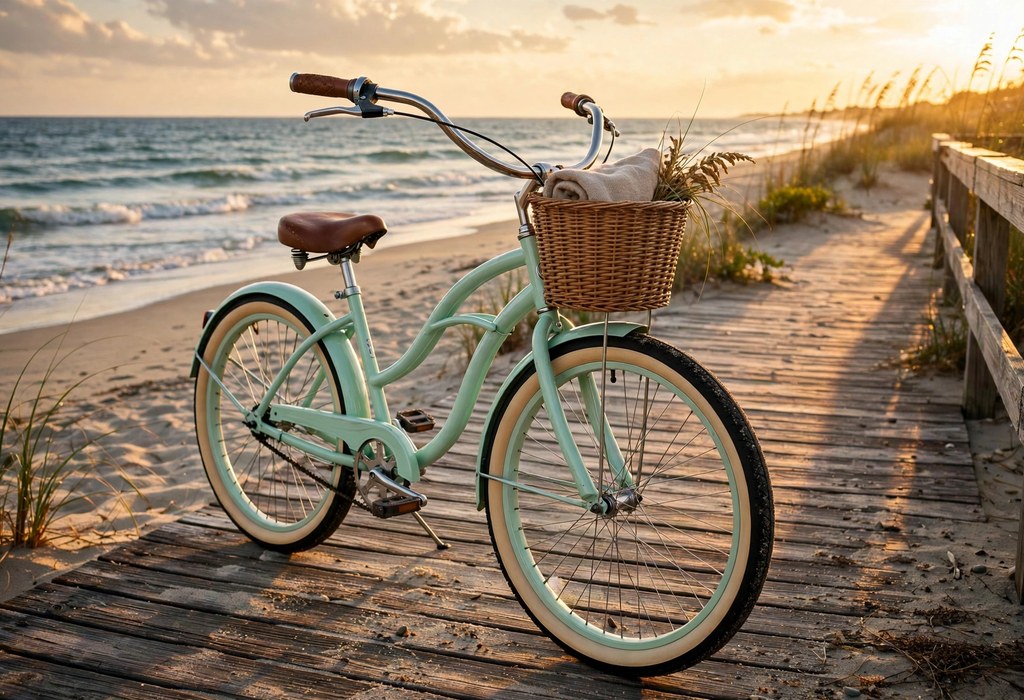
Choose a beach cruiser bike for relaxed riding on flat coastal paths and quiet neighborhood streets. Match the frame, tires, and gears to your regular routes before you buy anything. Test the fit in person whenever possible, because comfort matters more than style alone.
Additionally, this guide walks through sizing, comfort, braking, and simple coastal care in plain language. Furthermore, you will learn packed sand riding, gentle hill handling, and salt air protection. Finally, the closing checklist helps you compare models with confidence and avoid common first time mistakes. Relaxed coastal riding rewards thoughtful preparation before every outing.
What Defines A Beach Cruiser Bike
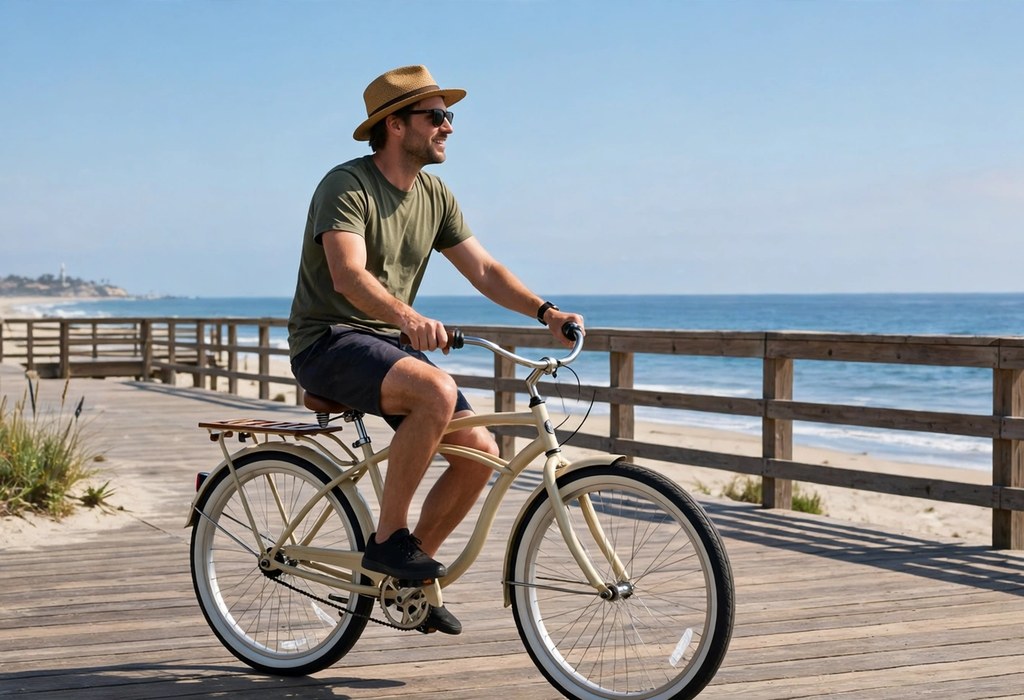
Additionally, a beach cruiser bike favors comfort over speed on every ride. Riders sit upright with relaxed shoulders, easy steering, and a wide padded saddle. Meanwhile, broad handlebars keep your hands in a natural position for long casual rides.
Beach Cruiser Bike Geometry And Upright Posture
Furthermore, relaxed geometry places the saddle slightly lower and farther back than sportier bikes use. Consequently, your back stays straighter, and your knees move through a comfortable pedaling arc. Riders enjoy the view instead of hunching over narrow handlebars all ride long.
Additionally, swept back handlebars reduce wrist strain during slow coastal rides. Riders steer with light inputs, and the bike responds calmly to gentle turns. Beginners gain confidence quickly because the riding position feels stable and familiar from the start.
Furthermore, the long wheelbase adds steadiness on boardwalks and smooth paved paths. Small steering corrections feel forgiving, and sudden gusts cause less drama than expected. Riders of many ages appreciate this calm handling on crowded scenic routes.
Beach Cruiser Bike Tires And Smooth Rolling Comfort
Meanwhile, wide balloon tires cushion bumps, cracks, and small pebbles along coastal paths. They spread your weight across a larger contact patch for extra stability. Additionally, lower rolling resistance at cruising speeds keeps pedaling easy and pleasant.
Moreover, riders notice smoother travel over wooden boardwalk seams and uneven pavement joints. The tires absorb small shocks before they reach your hands and saddle. Furthermore, wider rubber improves grip on dusty paths and damp morning pavement.
Similarly, choose tires with a simple tread pattern for mostly paved coastal riding. Smooth center tread rolls quietly, while side tread adds grip through gentle corners. Meanwhile, check tire condition often, because cuts and worn rubber reduce comfort and control.
Beach Cruiser Bike Controls For Easy Riding
Consequently, many cruisers use one gear and a coaster brake for maximum simplicity. Riders pedal forward to move, and they pedal backward gently to slow down. Beginners learn this system quickly, and maintenance stays refreshingly simple over many seasons.
Therefore, other cruisers add hand brakes, trigger shifters, or internal gear hubs for flexibility. These controls still feel intuitive after a short practice ride around the block. Additionally, clear controls help new riders focus on traffic, pedestrians, and scenery instead of mechanics.
Likewise, before buying, test every control slowly in an open parking area. Squeeze each brake lever separately, and shift through every gear without rushing the process. Consequently, you will discover confusing controls before they matter on a busy path.
Match Your Beach Cruiser Bike To Your Riding Style
Next, start with your most common route, not your dream vacation ride. Daily boardwalk loops need different features than sandy shoreline excursions or hilly neighborhood streets. Therefore, honest route notes lead to smarter choices and fewer regrets after purchase.
Short Boardwalk Rides And Neighborhood Loops
Finally, short flat rides reward simplicity, comfort, and easy parking at busy destinations. A single speed cruiser handles these routes beautifully without extra gears or complex controls. Additionally, a sturdy kickstand keeps the bike upright at cafes and viewpoints.
Also, riders who stop often appreciate a front basket for towels, snacks, and sunscreen. Furthermore, fenders keep splashes off clothing after rain or morning dew. Choose cheerful colors if visibility matters, because bright frames stand out in crowded areas.
Meanwhile, consider storage space at home before choosing a larger frame. Measure doorways, hallways, and garage corners before delivery day arrives. Compact storage habits protect paint, tires, and moving parts from accidental damage indoors.
Longer Coastal Paths And Mixed Surfaces
However, longer coastal paths reward comfortable saddles, efficient gearing, and reliable hand brakes. Riders cover more ground, so small fit problems grow noticeable after many miles. Therefore, prioritize saddle shape, grip comfort, and smooth shifting during test rides.
Additionally, mixed surfaces include paved paths, packed sand, gravel shoulders, and wooden bridges. Wider tires handle these changes with greater confidence than narrow road tires offer. Additionally, sealed components resist grit better than exposed parts on dusty trails.
Furthermore, carry water, a small pump, and a basic repair kit on longer rides. Furthermore, plan rest stops near shade, restrooms, and safe bike parking areas. Smart preparation turns a long coastal ride into a relaxing outing rather than an endurance test.
Family Rides And Shared Adventures
Meanwhile, family rides move at the slowest rider pace, so comfort beats speed every time. Choose stable handling, predictable brakes, and a saddle that supports relaxed pedaling. Additionally, matching cruiser styles help families ride together without constant mechanical adjustments.
Moreover, parents should check local rules for child seats, trailers, and tag along attachments. Compatibility varies by frame shape, rack mounts, and rear axle design. Furthermore, test any child carrying setup in an empty lot before joining busy paths.
Similarly, teach younger riders hand signals, safe passing calls, and stopping distances early. Practice starts, stops, and turns together until everyone feels calm and confident. Consequently, family rides stay fun, safe, and free from stressful surprises.
Beach Cruiser Bike Frame Materials And Geometry
Consequently, frame material shapes weight, ride feel, rust resistance, and long term durability. Steel frames feel smooth and sturdy, while aluminum frames feel lighter and easier to lift. Therefore, compare both materials during test rides before deciding which character suits you best.
Beach Cruiser Bike Steel Frames For Smoothness
Therefore, steel absorbs road vibration naturally, so riders feel less buzz through hands and saddle. Its sturdy construction tolerates bumps, curbs, and everyday handling with quiet confidence. Additionally, steel frames often cost less than comparable lightweight alternatives on the market.
However, bare steel needs protection from salt air and persistent moisture near coastlines. Paint chips expose metal, and rust can spread quietly under neglected scratches. Therefore, inspect the frame regularly, and touch up chips promptly with matching paint.
Likewise, steel cruisers weigh more than aluminum models, so lifting them onto racks takes effort. Riders with stairs, vehicle racks, or limited strength should test lifting before purchase. Furthermore, a lighter aluminum frame may suit daily carrying needs much better.
Beach Cruiser Bike Aluminum Frames For Lightness
Next, aluminum frames resist corrosion better than unprotected steel in salty coastal air. They also weigh less, which helps riders lift bikes onto racks and carry them upstairs. Additionally, modern aluminum cruisers still deliver a comfortable ride with wide tires fitted.
Finally, wider tires and padded saddles soften aluminum frame stiffness on most coastal paths. Riders rarely notice harshness at relaxed cruising speeds on smooth surfaces. Meanwhile, quality welds and thoughtful geometry matter more than material labels alone.
Also, check frame welds closely for smooth joints, even paint, and straight tube alignment. Poor welds signal rushed manufacturing, and they may fail under normal use over time. Consequently, buy from reputable sellers who offer clear warranties and responsive support.
Geometry Choices That Shape Comfort
However, geometry describes tube angles, tube lengths, and rider position across the whole frame. Longer chainstays improve stability, while relaxed head angles slow steering response gently. Additionally, these details explain why two similar looking cruisers can feel completely different.
Additionally, low bottom brackets lower your center of gravity for confident stops and starts. Riders place feet down easily at traffic lights, intersections, and crowded crossings. Furthermore, stable geometry helps beginners balance at slow speeds near pedestrians.
Furthermore, compare geometry charts only as a starting point for real test rides. Numbers cannot capture saddle comfort, grip shape, or handlebar reach perfectly. Therefore, ride several models back to back, and trust your body feedback over specifications alone.
Find Your Beach Cruiser Bike Size And Fit
Meanwhile, correct fit transforms a good cruiser into a bike you love riding daily. Poor fit causes knee pain, back strain, numb hands, and fading enthusiasm quickly. Therefore, measure carefully, test patiently, and adjust saddle and handlebar positions before final judgment.
Moreover, stand over the frame with both feet flat on the ground. You need comfortable clearance without stretching, tiptoeing, or feeling trapped by the top tube. Additionally, a proper beach cruiser bike size guide compares inseam measurements effectively. Similarly, test your chosen size on varied paths before finalizing any purchase.
Meanwhile, remember that wheel size alone does not determine proper frame fit. Frame reach, saddle height range, and handlebar position matter equally for comfort. Consequently, test rides reveal these relationships better than any single measurement printed online.
Measure Height And Inseam For Your Beach Cruiser Bike
Stand barefoot against a wall with heels together and posture tall. Measure total height first, then measure inseam from floor to crotch firmly. Additionally, record both numbers, because shops and sizing charts use them together for recommendations.
Compare your measurements with the manufacturer sizing chart for each specific model. Sizing varies between brands, frame styles, and wheel diameters in surprising ways. Furthermore, never assume one brand size matches another brand size exactly.
If measurements fall between sizes, test both sizes whenever possible. Smaller frames feel nimble and easy to mount, while larger frames offer stretched comfort. Consequently, personal preference often decides close sizing calls after careful test rides.
Adjust Saddle Height For Comfortable Pedaling
Set saddle height so your knee bends slightly at the lowest pedal position. Fully straight legs strain knees, while overly bent knees waste pedaling power. Additionally, small height changes create surprisingly large comfort differences over longer rides.
Tilt the saddle level first, then adjust tilt slightly for personal comfort. Nose down saddles push riders forward, while nose up saddles create pressure points. Furthermore, mark your preferred saddle position after finding comfort, because bumps can shift settings.
Cruiser saddles sit wider and softer than racing saddles for relaxed upright riding. However, overly soft saddles can cause discomfort during longer rides through pressure buildup. Therefore, test saddle width and padding during a ride lasting at least twenty minutes.
Set Handlebar Reach And Grip Position
Handlebars should sit close enough for relaxed elbows and straight wrists. Reaching too far strains shoulders, while cramped reach crowds breathing and steering control. Additionally, swept back bars bring grips closer without shortening the frame itself.
Adjust handlebar height until your shoulders relax completely during normal riding. Higher bars suit upright cruising, while lower bars suit faster pedaling efforts. Furthermore, test height changes gradually, because small adjustments affect comfort significantly.
Grips should feel secure without forcing a tight clenched hand position. Ergonomic grips support palms, while simple round grips suit short casual rides well. Meanwhile, replace worn grips promptly, because slippery grips reduce control in wet conditions.
Single Speed And Geared Beach Cruiser Bikes
Gearing choice affects simplicity, hill ability, maintenance, and overall riding enjoyment. Flat coastal towns favor single speed simplicity, while rolling neighborhoods reward versatile gears. Therefore, study your local terrain honestly before choosing between these two approaches.
Single speed cruisers use one gear ratio for every situation you encounter. Riders enjoy fewer parts, simpler maintenance, and a clean classic appearance. Additionally, comparing single speed vs geared beach cruiser bikes options clarifies hill performance and mechanical simplicity. Choose gears only when hills or headwinds appear regularly on routes.
Meanwhile, geared cruisers add flexibility without transforming the bike into a racing machine. Therefore, three speed and seven speed models handle gentle hills, headwinds, and longer routes comfortably. Choose gears if your routes include bridges, overpasses, or rolling streets.
When Single Speed Works Best
Single speed shines on flat boardwalks, beach paths, and calm neighborhood streets. Likewise, riders pedal at a comfortable cadence without thinking about shift timing. Additionally, fewer moving parts mean fewer adjustments, less chain wear, and simpler cleaning routines.
Coaster brakes pair naturally with single speed cruisers for clean simple operation. Next, riders brake by pedaling backward gently, which keeps handlebars free from levers. Furthermore, this system works reliably in sand and salt air with minimal exposed hardware.
However, single speed struggles on steep hills, strong headwinds, and longer distances. Finally, legs tire faster when the single gear feels too hard or too easy. Therefore, test your hardest local hill before committing to single speed simplicity.
When Gears Earn Their Keep
Gears let riders spin comfortably uphill, cruise efficiently on flats, and rest legs downhill. Also, internal gear hubs hide mechanisms inside the rear wheel for weather protection. Additionally, derailleur systems offer wider ranges at lower cost for varied terrain.
Shift early before hills steepen, because shifting under heavy pedal pressure strains chains. However, ease pedal pressure briefly, click the shifter, then resume smooth pedaling rhythm. Furthermore, practice shifting on quiet streets until gear changes feel automatic and calm.
Geared bikes need occasional cable adjustments, chain lubrication, and derailleur alignment checks. Additionally, these tasks stay simple with basic tools and occasional shop visits. Consequently, budget small maintenance time if you choose gears for hillier coastal routes.
Internal Hubs Versus Derailleurs
Internal hubs protect gears inside a sealed shell, which resists sand and salt exposure. Furthermore, riders shift while stopped, which helps at traffic lights and busy intersections. Additionally, internal hubs need less frequent adjustment than exposed derailleur systems require.
Derailleurs expose gears openly, so sand and salt can affect shifting performance faster. Meanwhile, regular cleaning keeps them smooth, and replacement parts cost less than hub parts. Furthermore, derailleurs suit riders who enjoy hands on maintenance and wider gear ranges.
Test both systems on similar hills during the same shopping trip if possible. Moreover, notice shift feel, noise, chain behavior, and ease of use under load. Therefore, personal comfort often matters more than technical specifications when choosing between hub styles.
Electric Beach Cruiser Bikes Explained
Electric cruisers add gentle motor assistance while preserving relaxed upright comfort. Similarly, riders pedal normally, and the motor smooths hills, headwinds, and longer distances. Therefore, electric assistance opens coastal riding to more people with varied fitness levels.
Pedal assist systems respond to your pedaling effort with proportional motor support. Consequently, throttle systems move the bike without pedaling, which suits starts and tired legs. Additionally, learning about electric beach cruiser bikes clarifies assist levels, battery placement, and controls. Check path rules carefully before riding electric models on shared trails.
Meanwhile, check local path rules for electric bikes before riding shared coastal trails. Some paths limit motor power, top assisted speed, or throttle use entirely. Respect these rules, because they protect pedestrians, wildlife areas, and continued trail access.
Pedal Assist Levels And Riding Feel
Therefore, lower assist levels feel like a gentle tailwind pushing you along flat paths. Higher assist levels flatten hills and reduce effort during longer coastal rides. Additionally, adjustable levels let riders conserve battery on flats and boost power for climbs.
Likewise, start with the lowest assist level during your first electric test ride. Increase assistance gradually as you learn acceleration, braking distance, and handling changes. Furthermore, stronger assistance lengthens stopping distances, so practice braking early and often.
Next, battery range depends on assist level, rider weight, wind, hills, and tire pressure. Ride conservatively on first outings until you learn real world range patterns. Consequently, carry a charger plan for longer trips, and avoid draining batteries completely.
Batteries, Charging, And Storage
Finally, charge batteries indoors in a cool dry place away from direct sunlight. Follow manufacturer charging instructions exactly, and avoid damaged chargers or frayed cables. Additionally, store batteries partially charged during long breaks between riding seasons.
Also, remove batteries before lifting heavy electric cruisers onto vehicle racks. This step reduces lifting weight and protects electrical connectors from strain. Furthermore, lock batteries securely during rides, because loose batteries rattle and wear mounts.
However, inspect battery mounts, cables, and connectors regularly for corrosion or loose fittings. Salt air affects electrical contacts faster than dry inland air affects them. Therefore, wipe contacts gently, keep them dry, and seek professional help for electrical problems.
Weight, Handling, And Transport
Additionally, electric cruisers weigh substantially more than pedal only cruisers because of motors and batteries. Heavier bikes feel stable at speed, but they demand careful handling at slow speeds. Additionally, practice low speed turns and stops before riding crowded paths.
Furthermore, vehicle racks must support electric bike weight and wheel size safely. Check rack ratings carefully, because standard racks may not handle heavier electric models. Furthermore, test loading and unloading with help before attempting solo transport trips.
Meanwhile, storage space matters more with heavier electric cruisers, so measure elevators and doorways. Ground floor storage simplifies daily use and reduces lifting strain significantly. Consequently, plan storage before purchase, not after delivery day frustration arrives.
Beach Cruiser Bike Tires, Wheels, And Sand Performance
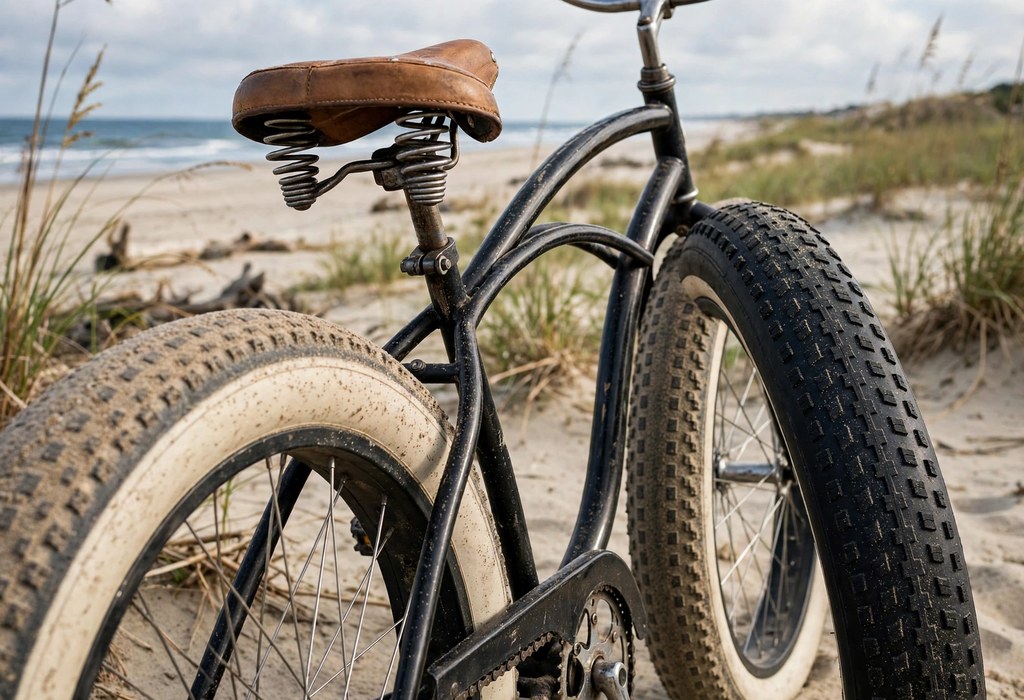
Moreover, tires determine comfort, grip, and sand performance more than any other component. Wide tires float better on soft surfaces, while narrow tires sink quickly. Therefore, match tire width to your sand ambitions before choosing a standard cruiser model.
Similarly, standard cruiser tires handle boardwalks, paved paths, and firmly packed sand near waterlines. They roll smoothly, cushion bumps, and steer predictably at relaxed speeds. Additionally, riders on a beach cruiser bike on soft sand route need wider tires and steadier pedaling. Consequently, walk extremely soft patches instead of exhausting yourself unnecessarily.
Meanwhile, check local beach access rules before riding directly on sand. Some beaches restrict cycling to protect dunes, wildlife, and pedestrian safety. Therefore, respect posted signs, because access privileges depend on responsible rider behavior every season.
Packed Sand Versus Loose Sand
Packed sand near the waterline feels firm, smooth, and surprisingly rideable for cruisers. Tires grip well, pedaling stays efficient, and steering responds predictably on damp surfaces. Additionally, ride early or late when crowds thin and sand stays firm.
Loose dry sand demands more effort, wider tires, and patient steady pedaling technique. Front wheels wander, rear wheels slip, and momentum disappears quickly without consistent effort. Furthermore, dismount and walk through extremely soft patches instead of fighting exhaustion.
Watch for hidden shells, seaweed clumps, and sudden soft spots near dune edges. These hazards slow wheels abruptly and can throw riders off balance unexpectedly. Consequently, scan ahead constantly, relax your grip, and keep speeds moderate on sand.
Tire Pressure Adjustments For Sand
Lower tire pressure increases the contact patch and helps tires float over soft sand. Riders gain traction and stability, but they also increase rolling resistance on pavement. Additionally, carry a portable pump for reinflating tires before returning to paved paths.
Reduce pressure gradually in small steps, then test handling on short sand stretches. Overly soft tires feel squirmy, risk rim damage, and increase pinch flat chances. Furthermore, restore normal pressure promptly after sand riding to protect tires and rims.
Check sidewall markings for recommended pressure ranges before making any adjustments. Manufacturers design tires for specific ranges, and extreme deviations damage casings over time. Therefore, treat pressure changes as temporary sand tactics, not permanent settings.
Wheel Sizes And Stability
Larger wheels roll over bumps, boardwalk seams, and small debris more smoothly. Smaller wheels accelerate quickly and feel nimble in tight parking areas. Additionally, adult cruisers commonly use larger wheels for stable relaxed coastal riding.
Wheel strength matters on sand, because soft surfaces stress spokes unevenly during pedaling. Check spoke tension regularly, and listen for creaks or pings during rides. Furthermore, professional wheel truing restores roundness after heavy sand use or curb impacts.
Choose rims with sturdy construction and corrosion resistant finishes for coastal use. Salt air attacks bare metal, while sealed rims protect spoke nipples better. Consequently, rinse wheels after beach rides, dry them thoroughly, and inspect for early rust.
Fat Tire Beach Cruiser Bikes For Softer Terrain
Fat tire cruisers use extra wide tires for flotation on sand, snow, and loose gravel. Their massive contact patch spreads weight widely and reduces sinking dramatically. Therefore, riders who love shoreline exploration often prefer fat tires over standard cruiser tires.
Fat tires also cushion rough paths beautifully, because large air volume absorbs bumps effectively. Riders feel less vibration on boardwalks, gravel shoulders, and uneven beach access trails. Additionally, exploring fat tire beach cruiser bikes clarifies tire widths, frame clearance, and handling tradeoffs. Test fat tires on sand and pavement during the same shopping trip.
Meanwhile, fat tires add weight, rolling resistance, and storage bulk compared with standard tires. Likewise, paved path riding feels slower, and lifting the bike takes more effort. Weigh these tradeoffs honestly against your actual sand riding frequency.
When Fat Tires Make Sense
Fat tires make sense for frequent soft sand riding, loose gravel paths, and uneven terrain. Next, they maintain traction where standard tires spin, sink, or wander uncontrollably. Additionally, heavier riders often appreciate extra stability from wider contact patches.
Beginners gain confidence from fat tire stability at slow speeds on unpredictable surfaces. Finally, the bike feels planted, steering feels forgiving, and balance comes more naturally. Furthermore, fat tires forgive small steering mistakes that narrow tires punish quickly.
However, fat tires suit relaxed exploration better than fast pavement commuting. Also, extra rolling resistance slows acceleration and increases pedaling effort on smooth roads. Therefore, choose fat tires for terrain benefits, not for speed on paved routes.
Fat Tire Handling Tips
Steer fat tire cruisers with gentle inputs, because wide tires respond differently than narrow tires. However, lean subtly into turns, keep weight centered, and avoid sudden handlebar jerks. Additionally, practice turns on open sand before riding crowded beach access paths.
Braking distances lengthen slightly with heavier fat tire wheels and soft surfaces. Additionally, squeeze brakes progressively, shift weight rearward slightly, and anticipate stops earlier. Furthermore, test braking on sand away from pedestrians before joining busy shoreline routes.
Maintain fat tires carefully, because large tires hide slow leaks and pressure changes. Furthermore, check pressure before every sand ride, inspect sidewalls for cuts, and clean tread regularly. Consequently, consistent tire care preserves the flotation advantage fat tires provide.
Beach Cruiser Bike Brakes And Stopping Control
Brakes deserve attention equal to comfort, because coastal paths mix pedestrians, dogs, children, and vehicles. Meanwhile, reliable stopping power prevents collisions, builds confidence, and protects everyone sharing the path. Therefore, understand your brake system thoroughly before riding busy routes.
Coaster brakes stop the bike when riders pedal backward gently and steadily. Moreover, hand brakes use levers to squeeze rim or disc pads against braking surfaces. Additionally, some cruisers combine both systems for redundancy on hills and crowded paths.
Test brakes before every ride with a slow roll and gentle squeeze. Similarly, listen for scraping, squealing, or grinding sounds that signal worn pads or contamination. Furthermore, a guide to beach cruiser bike brake problems explains dragging brakes, weak stopping, and noisy pads. Seek professional help promptly when braking stays weak after adjustments.
Coaster Brakes Explained
Coaster brakes hide inside the rear hub, which protects them from sand and salt spray. Riders activate them by pedaling backward, so hands stay free for steering. Additionally, coaster brakes require little routine adjustment compared with exposed hand brake systems.
Consequently, practice coaster braking on flat open ground before riding hills or crowded paths. Pedal backward smoothly rather than stomping, because abrupt braking can skid rear wheels. Furthermore, keep feet ready on pedals, since coaster brakes need pedal position for activation.
Therefore, coaster brakes can overheat on long descents, which reduces stopping power gradually. Alternate braking with coasting, walk steep descents if needed, and avoid sustained downhill dragging. Consequently, riders in hilly coastal towns often prefer added hand brakes too.
Hand Brakes And Disc Brakes
Likewise, hand brakes give independent front and rear control for precise stopping on varied terrain. Rim brakes squeeze pads against wheel rims, while disc brakes squeeze rotors near hubs. Additionally, disc brakes perform more consistently in wet sandy conditions than rim brakes.
Next, squeeze both brakes progressively rather than grabbing the front brake alone suddenly. Front brakes provide most stopping power, but abrupt front braking can pitch riders forward. Furthermore, practice emergency stops in empty lots until braking feels smooth and instinctive.
Finally, inspect brake pads regularly for wear, glazing, sand contamination, and proper alignment. Replace worn pads promptly, clean rotors gently, and adjust cables as they stretch. Therefore, brake maintenance belongs in every regular safety check without exception.
Fixing Common Brake Issues
Also, squealing brakes often signal contaminated pads, glazed surfaces, or slight misalignment issues. Clean pads carefully, check alignment, and replace pads if noise persists after cleaning. Additionally, sand in brake mechanisms causes grinding, so rinse components after beach rides.
However, weak braking may result from stretched cables, worn pads, oily rotors, or hub problems. Adjust cable tension gradually, inspect pads closely, and test stopping power after each change. Furthermore, seek professional help promptly if braking stays weak despite basic adjustments.
Additionally, dragging brakes slow riding, wear pads quickly, and overheat components during longer rides. Check wheel alignment, cable routing, and pad clearance before assuming major mechanical failure. Consequently, small adjustments often restore smooth free rolling quickly.
Beach Cruiser Bike Comfort Features That Matter Daily
Furthermore, comfort features separate bikes you ride occasionally from bikes you ride joyfully every day. Saddles, grips, handlebars, and suspension details shape daily enjoyment significantly. Therefore, evaluate comfort features during real rides, not just showroom glances.
Saddles For Relaxed Riding
Meanwhile, wide cruiser saddles distribute weight across sit bones for comfortable upright posture. Springs under some saddles absorb bumps and add classic cruiser charm. Additionally, spring saddles suit boardwalks and paved paths better than rough off road trails.
Moreover, test saddles for at least twenty minutes, because showroom comfort misleads many buyers. Pressure points appear gradually, and saddle width needs match individual anatomy closely. Furthermore, padded covers offer temporary relief but cannot fix fundamentally poor saddle fit.
Similarly, adjust saddle tilt and fore aft position after choosing a comfortable saddle shape. Small position changes relieve pressure, improve pedaling efficiency, and reduce numbness. Consequently, treat saddle setup as a personal tuning process, not a one time guess.
Grips And Handlebar Comfort
Consequently, grips connect hands to steering, so comfort and control depend heavily on grip design. Soft rubber grips cushion vibration, while ergonomic grips support palms during longer rides. Additionally, lock on grips stay secure better than slip on grips in wet conditions.
Therefore, swept back handlebars position hands naturally behind the steering axis for relaxed control. Wider bars improve leverage, while narrower bars suit crowded paths and tight storage. Furthermore, test bar width during turns, because overly wide bars feel awkward indoors.
Likewise, replace grips when rubber hardens, cracks, or rotates unexpectedly during rides. Worn grips reduce control, increase hand fatigue, and compromise safety in rain. Therefore, treat grips as consumable comfort parts, not permanent bike fixtures.
Suspension And Vibration Damping
Next, most cruisers skip suspension forks to preserve simplicity, style, and low maintenance needs. Wide tires and sprung saddles provide enough cushioning for smooth coastal paths. Additionally, suspension adds weight, complexity, and maintenance that casual riders rarely need.
Finally, some cruisers offer suspension seat posts for extra comfort on bumpy boardwalks. These posts absorb small shocks without changing steering geometry significantly. Furthermore, test suspension posts carefully, because overly soft posts bounce during pedaling efforts.
Also, front suspension suits rougher mixed terrain, gravel paths, and cracked urban streets better. However, suspension forks require regular service, seals checks, and proper adjustment for rider weight. Therefore, choose suspension only when your routes truly demand extra cushioning.
Beach Cruiser Versus Hybrid Bikes
However, shoppers often compare cruisers with hybrids, because both bikes promise comfortable everyday riding. Hybrids blend road efficiency with mountain bike versatility for varied routes. Cruisers prioritize relaxed posture and simplicity over speed and climbing performance.
Additionally, hybrids use narrower tires, multiple gears, and more forward leaning positions for efficiency. They climb hills better, accelerate faster, and cover longer distances with less effort. Additionally, a detailed beach cruiser bike vs hybrid bike comparison matches posture, gearing, and tire width. Furthermore, test both styles on identical routes before making a final decision.
Meanwhile, cruisers win for short relaxed rides, beach paths, and style focused cruising. Their upright posture, wide saddles, and simple controls feel welcoming to casual riders. Meanwhile, choose based on route demands, not marketing claims about versatility alone.
Posture And Speed Differences
Cruiser posture keeps riders upright with excellent visibility and relaxed breathing. Hybrid posture leans slightly forward for aerodynamic efficiency and stronger pedaling leverage. Additionally, upright posture suits sightseeing, conversation, and frequent stops better.
Hybrids travel faster on pavement because narrower tires reduce rolling resistance significantly. Cruisers travel slower by design, which suits crowded paths and scenic enjoyment perfectly. Furthermore, speed differences matter little on short coastal rides under gentle conditions.
Consider your companions and typical pace when choosing between these styles. Riding a fast hybrid among slow cruisers creates constant braking and frustration. Consequently, matching bike style to riding group pace improves social rides greatly.
Terrain And Versatility Tradeoffs
Hybrids handle gravel paths, light trails, and urban streets with greater versatility. Their gear ranges climb hills, and their tires balance speed with moderate off pavement grip. Additionally, hybrids suit riders who commute weekdays and explore trails on weekends.
Cruisers handle boardwalks, paved paths, packed sand, and neighborhood streets most happily. They struggle on steep hills, rough trails, and long distances compared with hybrids. Furthermore, cruiser simplicity appeals to riders who dislike frequent shifting and maintenance.
List every surface you ride weekly, then choose the bike that handles most surfaces comfortably. Occasional rough terrain should not dictate your primary bike choice completely. Therefore, rent or borrow for rare adventures instead of compromising daily comfort.
Beach Cruiser Bike Step Through Designs And Easy Mounting
Step through frames remove the high top tube barrier between saddle and handlebars. Riders step through the frame easily instead of swinging a leg high. Therefore, step through designs suit many riders, including those with limited flexibility or heavy loads.
Low frames help riders mount confidently at crowded intersections and busy beach parking areas. They also simplify mounting while wearing skirts, dresses, or stiff footwear. Additionally, learning about step through beach cruiser bikes clarifies frame heights, stiffness, and mounting ease. Compare mounting ease with loaded baskets during real test rides.
Meanwhile, step through frames sometimes flex slightly more than diamond frames under heavy loads. Moreover, quality construction minimizes flex, and most casual riders never notice differences. Test loaded handling before deciding if frame stiffness concerns you.
Who Benefits Most From Step Through Frames
Riders with hip, knee, or balance concerns benefit greatly from low step through access. Similarly, mounting becomes a simple step rather than a balance challenge at every stop. Additionally, older riders and new cyclists gain confidence from easier starts and stops.
Delivery riders, parents, and shoppers appreciate step through frames when carrying baskets or bags. Consequently, they mount without lifting legs over cargo, which prevents awkward tipping moments. Furthermore, step through frames simplify parking in tight crowded bike racks.
Anyone can ride step through frames, regardless of gender or riding experience level. Therefore, frame choice reflects comfort and practicality, not rider identity or skill level. Consequently, choose the frame that makes every start feel easy and safe.
Frame Strength And Riding Feel
Modern step through frames use curved tubes, reinforced joints, and thoughtful geometry for strength. Likewise, they handle normal coastal riding, gentle hills, and loaded baskets reliably. Additionally, quality brands test frames thoroughly before selling them to casual riders.
Heavier riders should check manufacturer weight guidance for specific step through models. Next, frame ratings vary, and exceeding guidance affects handling, durability, and warranty coverage. Furthermore, shops can recommend reinforced models for heavier loads or cargo use.
Ride step through and diamond frames back to back on identical routes if possible. Finally, notice mounting ease, steering feel, acceleration, and stability during stops. Therefore, direct comparison reveals personal preferences better than frame diagrams alone.
Protect Your Beach Cruiser Bike From Salt Air
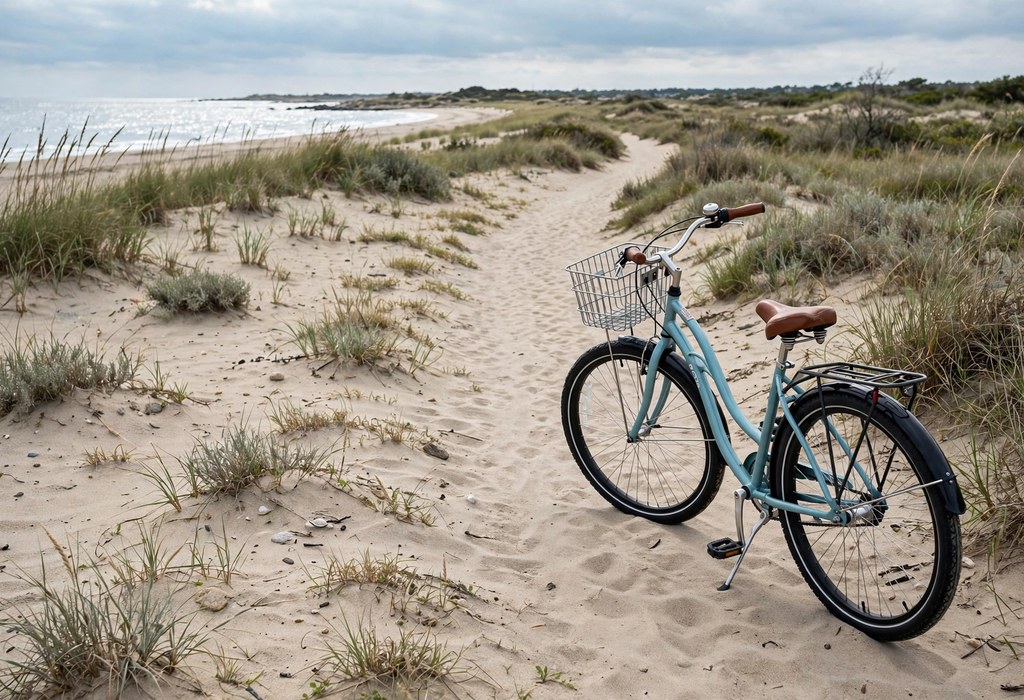
Salt air attacks metal parts relentlessly, even when bikes never touch ocean water directly. Also, moisture carries salt onto chains, spokes, bolts, and brake components daily. Therefore, coastal riders need simple protective habits that prevent corrosion before it starts.
Rinse bikes with fresh water after rides near surf, spray, or sandy shorelines. However, dry frames thoroughly with a soft cloth, paying attention to bolts and joints. Additionally, understanding salt air rust on a beach cruiser bike reveals early corrosion on chains and spokes. Rinse promptly after every coastal ride to slow corrosion effectively.
Meanwhile, store bikes indoors or under breathable covers away from direct sea breezes. Enclosed storage slows corrosion dramatically compared with open balcony exposure. Never wrap wet bikes in plastic, because trapped moisture accelerates rust formation quickly.
Daily Rinse And Drying Habits
Additionally, shake loose sand off tires, fenders, and drivetrain components before rinsing gently. Use low pressure fresh water, because high pressure forces grit into bearings and hubs. Additionally, wipe the chain lightly after rinsing to remove moisture and salty residue.
Furthermore, dry the bike with a clean cloth, then allow air circulation around stored bikes. Pay special attention to spoke nipples, chain links, and bolt heads where rust starts. Furthermore, a quick daily wipe takes minutes and saves costly component replacements later.
Meanwhile, avoid harsh detergents on painted frames, leather saddles, and rubber grips during cleaning. Mild soap protects finishes, while strong chemicals strip protective coatings and dry rubber. Consequently, gentle cleaning preserves both appearance and component life longer.
Lubrication And Protective Coatings
Moreover, lubricate chains lightly after cleaning, then wipe excess lubricant from outer plates. Excess lubricant attracts sand, which grinds chains and gears during subsequent rides. Additionally, choose wet lubricants for coastal humidity and dry lubricants for dusty inland paths.
Similarly, apply protective wax or frame polish to painted metal surfaces periodically for extra defense. These coatings repel moisture and make future cleaning easier after beach rides. Furthermore, inspect coating wear after storms, because salt spray strips protection faster.
Consequently, treat small paint chips immediately with touch up paint and rust inhibitor products. Chips expose bare metal, and coastal moisture attacks exposed areas within days. Therefore, keep touch up supplies handy, and inspect frames monthly during beach season.
Storage Strategies For Coastal Homes
Therefore, indoor storage offers the best protection from salt air, humidity, and sudden storms. Garages, sheds, and spare rooms shield bikes from corrosive breezes effectively. Additionally, wall hooks keep bikes off damp floors and free valuable floor space.
Likewise, outdoor storage requires sturdy covers, raised stands, and regular inspection routines. Covers must breathe, because sealed covers trap humidity against metal surfaces. Furthermore, move covered bikes periodically to check for moisture, insects, and rust.
Next, apartment riders can use balcony covers, hallway hooks, or compact indoor stands creatively. Measure spaces carefully, protect walls from tire marks, and keep pathways clear. Consequently, thoughtful storage habits fit coastal living without sacrificing bike protection.
Beach Cruiser Bike Accessories For Coastal Riding
Finally, accessories transform a basic cruiser into a practical daily companion for coastal life. Baskets carry beach gear, lights improve visibility, and locks protect investments at busy destinations. Therefore, choose accessories that match real riding habits, not showroom excitement alone.
Also, start with safety accessories before decorative upgrades, because visibility and security matter most. Lights, bells, and locks serve every ride, while decorative items serve personal style only. Additionally, a curated list of beach cruiser bike accessories compares baskets, racks, fenders, and lights. However, verify compatibility carefully before ordering accessories online or in shops.
Meanwhile, check accessory compatibility with frame mounts, handlebar diameter, and tire clearance. Universal accessories sometimes fit poorly, rattle constantly, or interfere with brakes. Additionally, test fit carefully before long rides, and tighten mounts regularly after installation.
- Front basket: Carry towels, snacks, and sunscreen securely without balancing bags on handlebars. Choose sturdy mounts that resist rattling on bumpy boardwalk paths.
- Rear rack: Support heavier loads, panniers, and picnic supplies while keeping weight low and centered. Check weight limits carefully before loading heavy picnic supplies.
- Fenders: Block sand, spray, and puddle water from clothing during wet coastal rides. Choose wide fenders that cover tires fully during wet rides.
- Lights: Improve visibility at dawn, dusk, and cloudy beach weather for safer shared path riding. Charge rechargeable lights regularly to avoid unexpected darkness.
- Lock: Protect your cruiser at cafes, beaches, and trailheads with a sturdy locking system. Lock frames and wheels together whenever parking in busy areas.
- Bell: Alert pedestrians politely on crowded boardwalks before passing at safe speeds. Ring bells early enough for pedestrians to react calmly.
Carrying Gear Comfortably
Front baskets suit light loads and quick access during short beach trips. Rear racks handle heavier loads better, because weight sits lower near the rear axle. Additionally, distribute weight evenly to preserve steering balance and braking control.
Secure loose items with straps, nets, or closed bags before riding bumpy paths. Unsecured items bounce out, distract riders, and create hazards for following cyclists. Furthermore, test loaded handling in empty lots before riding crowded coastal routes.
Avoid hanging heavy bags from handlebars, because swinging weight destabilizes steering quickly. Handlebar bags should stay light and balanced for safe control at low speeds. Consequently, racks and baskets offer safer carrying solutions for most coastal riders.
Visibility And Safety Gear
Wear a properly fitted helmet on every ride, regardless of distance or speed. Helmets protect against falls on boardwalks, sand, and crowded intersections alike. Additionally, replace helmets after any impact, because hidden damage reduces future protection.
Use front white lights and rear red lights during low light conditions and cloudy weather. Reflective clothing, ankle bands, and wheel reflectors increase visibility further. Furthermore, bright clothing helps drivers and pedestrians notice riders earlier on shared paths.
Carry a phone, identification, water, and basic repair tools on longer coastal rides. A small saddlebag holds these essentials without affecting handling or comfort. Therefore, preparation supports safety without adding noticeable weight or complexity.
Riding Technique For Relaxed Coastal Routes
Good technique makes coastal riding smoother, safer, and more enjoyable for everyone sharing paths. Relaxed posture, smooth pedaling, and early anticipation prevent most common cruising mishaps. Therefore, practice technique deliberately during calm rides before tackling crowded weekends.
Smooth Starts, Stops, And Turns
Start pedaling gently from a stable foot position with brakes released fully. Push off smoothly, settle onto the saddle, then build speed gradually. Additionally, sudden starts waste energy and startle nearby pedestrians on shared paths.
Brake early and progressively as you approach stops, intersections, and crowded areas. Shift weight slightly rearward, keep hands relaxed, and look ahead through stops. Furthermore, put one foot down confidently at stops instead of wobbling uncertainly.
Turn with gentle handlebar inputs and subtle body lean rather than sharp steering jerks. Look through turns toward your exit path, and slow before entering curves. Consequently, smooth turns preserve balance on sand, boardwalks, and wet pavement alike.
Pedaling Rhythm And Energy Management
Pedal at a comfortable rhythm that lets you breathe easily and converse normally. Grinding hard gears tires legs quickly, while spinning too fast wastes energy unnecessarily. Additionally, shift gears early to maintain rhythm across gentle hills and headwinds.
Relax shoulders, elbows, and hands during pedaling to prevent fatigue and numbness. Tension travels through arms into steering, which makes handling feel twitchy and nervous. Furthermore, shake hands out briefly at safe stops during longer rides.
Take short breaks before fatigue affects judgment, balance, or reaction time significantly. Rest in shade, drink water, and stretch legs during longer coastal outings. Therefore, pacing preserves enjoyment and safety better than pushing through exhaustion stubbornly.
Riding In Wind And Changing Weather
Coastal winds shift quickly, so lean slightly into crosswinds and grip handlebars firmly. Gusts push wide cruiser tires and upright riders more than aerodynamic bikes. Additionally, reduce speed during strong gusts, because sudden wind shifts affect balance unexpectedly.
Rain makes boardwalks, painted lines, and metal bridges slippery for cruiser tires. Brake earlier, avoid painted surfaces when possible, and reduce lean angles through turns. Furthermore, fenders and careful speed choices keep rainy rides manageable and comfortable.
Heat demands water, sunscreen, shade breaks, and light breathable clothing during coastal rides. Watch for dizziness, cramps, and unusual fatigue as warning signs for overheating. Consequently, cut rides short when heat or storms threaten safety or comfort.
Safety, Etiquette, And Shared Paths
Shared coastal paths succeed when every rider respects pedestrians, wildlife, and other cyclists. Clear communication, predictable movement, and moderate speeds prevent conflicts effectively. Therefore, treat path etiquette as safety equipment, not optional politeness alone.
Passing Pedestrians And Other Riders
Announce passes early with a friendly bell ring or clear voice call. Slow down before passing, leave generous space, and pass only with clear sightlines ahead. Additionally, thank pedestrians after passing, because courtesy encourages continued path sharing goodwill.
Never pass on blind curves, narrow bridges, or crowded boardwalk sections with limited visibility. Wait patiently for safe passing zones, even when delays frustrate your riding rhythm. Furthermore, children and dogs change direction unpredictably, so give them extra space.
Ride on the correct side of paths consistently, and avoid weaving between pedestrians. Predictable lines help everyone anticipate your movement and avoid collisions. Consequently, steady predictable riding feels safer for walkers and cyclists alike.
Intersections, Driveways, And Traffic
Slow down at every intersection, driveway, and beach parking exit before proceeding. Drivers often overlook cyclists, especially near beach traffic and turning vehicles. Additionally, make eye contact with drivers whenever possible before crossing vehicle paths.
Use hand signals clearly for turns and stops when riding near traffic. Signal early, keep one hand steady on handlebars, and resume two hand control promptly. Furthermore, bright clothing and lights improve driver awareness during dawn and dusk rides.
Obey traffic signals, stop signs, and local cycling rules on streets and crossings. Rules protect riders legally and physically, even when roads appear empty. Therefore, consistent rule following builds driver trust and safer cycling conditions over time.
Wildlife, Dunes, And Beach Protection
Stay on designated paths and approved beach riding areas to protect dunes and wildlife. Dune plants stabilize sand, and nesting areas need undisturbed space during sensitive seasons. Additionally, avoid riding through seaweed wrack zones where shorebirds feed actively.
Carry trash out, secure loose items, and avoid disturbing animals during coastal rides. Leave shells, plants, and natural features where you find them for others. Furthermore, responsible behavior preserves beach access for cyclists in future seasons.
Check seasonal closures and local regulations before riding unfamiliar beaches or coastal trails. Rules change with wildlife seasons, erosion conditions, and community events frequently. Consequently, quick local checks prevent fines and protect fragile coastal environments.
Beach Cruiser Bike Maintenance Routine For Long Life
Simple routine maintenance keeps cruisers reliable, safe, and enjoyable for many years. Regular checks catch wear early, before small problems become expensive repairs. Therefore, build maintenance habits into your riding routine rather than treating them as chores.
Before Every Ride Checklist
Squeeze brakes, spin wheels, and check tire pressure before every ride starts. Look for loose bolts, wobbly wheels, and unusual noises during this quick check. Additionally, confirm quick releases and axle nuts feel tight before leaving home or parking areas.
Check chain tension and lubrication quickly by spinning pedals backward slowly. Dry squeaky chains need lubricant, while gritty chains need cleaning before riding. Furthermore, inspect saddle and handlebar tightness, because loose controls create dangerous surprises.
Test lights, bells, and reflectors before dawn, dusk, or cloudy rides begin. Replace weak batteries promptly, and clean reflectors for maximum visibility. Consequently, a two minute check prevents most preventable roadside problems effectively.
Weekly And Monthly Care Tasks
Clean frames, tires, and drivetrain components weekly during frequent coastal riding seasons. Remove sand from chains, gears, and brake surfaces before grit causes wear. Additionally, lubricate chains after cleaning, then wipe excess lubricant away carefully.
Inspect tires monthly for cuts, embedded debris, worn tread, and sidewall cracks. Check spoke tension by squeezing pairs gently and listening for loose spokes. Furthermore, tighten bolts gradually to recommended tightness without overtorquing delicate parts.
Schedule professional tune ups annually or after heavy beach seasons for thorough inspection. Shops check bearings, hubs, bottom brackets, and brake internals professionally. Therefore, annual service complements home care and catches hidden wear early.
Seasonal Storage And Revival
Clean bikes thoroughly before seasonal storage, then lubricate chains and protect metal surfaces. Store bikes indoors in dry locations with tires slightly inflated for shape. Additionally, hang bikes or use stands to relieve tire pressure during long storage.
Cover stored bikes with breathable covers to prevent dust accumulation and moisture trapping. Check stored bikes monthly for rust, pests, and tire condition changes. Furthermore, rotate wheels occasionally to prevent flat spots during extended storage periods.
Revive stored bikes gradually with fresh lubrication, tire inflation, and brake testing. Inspect cables, pads, and tires closely before first spring rides begin. Consequently, careful revival prevents early season breakdowns and safety surprises.
Buying Checklist And Test Ride Plan
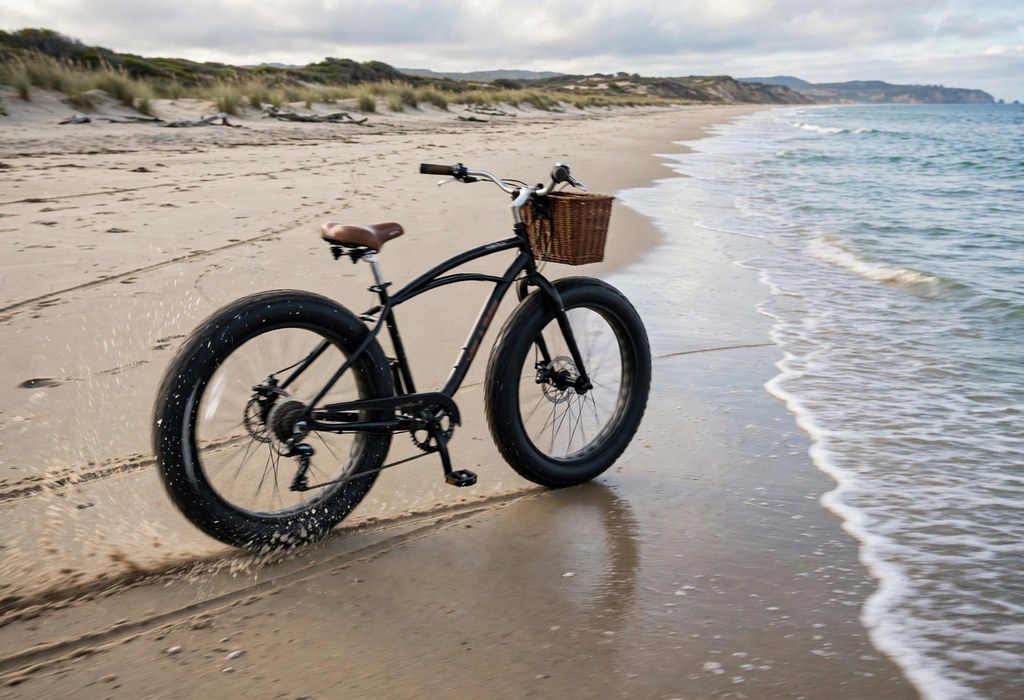
A structured buying checklist prevents impulse purchases and overlooked fit problems. Compare models side by side, test ride patiently, and verify warranty terms carefully. Therefore, treat buying as a deliberate process, not a single showroom visit decision.
- Fit first: Confirm standover clearance, saddle height, and handlebar reach before considering colors or accessories. Ignore colors until fit, comfort, and control feel completely right.
- Terrain match: Match tires, gears, and brakes to your most frequent routes rather than rare dream trips. Prioritize routes you ride weekly over rare vacation adventures.
- Brake test: Practice stops from cruising speed in a safe open area before committing to any model. Repeat stops several times to confirm consistent braking power.
- Comfort check: Ride for at least twenty minutes to reveal saddle, grip, and posture problems early. Notice pressure points early before they become lasting discomfort.
- Maintenance plan: Ask about service intervals, parts availability, and local shop support before purchase. Confirm local shops stock parts for your chosen model.
- Warranty review: Read frame, component, and electrical coverage terms carefully before signing or paying. Keep warranty documents accessible for future service claims.
Questions To Ask Sellers
Ask sellers about frame weight limits, recommended tire pressures, and service intervals clearly. Request assembly details, warranty claim processes, and replacement part availability upfront. Additionally, reputable sellers answer confidently without vague promises or pressure tactics.
Ask whether assembly includes safety checks, brake adjustments, and gear tuning before delivery. Poor assembly causes many new bike problems, regardless of brand quality levels. Furthermore, professional assembly protects warranties and ensures safe first rides.
Ask about return policies, exchange windows, and restocking conditions before paying anything. Online purchases need clear return terms, because fit surprises happen frequently. Consequently, strong return policies reduce buying risk for first time cruiser shoppers.
New Versus Pre Owned Cruisers
New cruisers offer warranties, fresh components, and professional assembly support reliably. They cost more initially, but they reduce immediate repair risks for beginners. Additionally, new bikes let buyers choose exact sizes, colors, and accessory packages.
Pre owned cruisers offer value, character, and lower entry costs for budget conscious riders. Inspect frames for cracks, rust, bent forks, and worn components carefully before buying. Furthermore, budget for professional inspection and possible replacement parts after purchase.
Test ride pre owned bikes thoroughly, checking brakes, gears, steering, and wheel trueness closely. Negotiate repairs or price adjustments based on inspection findings fairly. Therefore, patient pre owned shopping rewards careful buyers with excellent coastal cruisers.
Frequently Asked Questions
Can A Beach Cruiser Bike Handle Daily Commuting On Flat Routes?
Yes, a beach cruiser handles flat daily commuting comfortably when routes stay short and mostly paved.
How Do I Find The Right Fit For A Cruiser?
Measure your inseam, compare manufacturer charts, and test ride sizes until pedaling feels natural and relaxed.
Are Beach Cruiser Bikes Good For Riding On Sand?
Cruisers handle firm packed sand well, while wider tires and lower pressure improve performance on softer sand.
What Maintenance Does A Beach Cruiser Need After Coastal Rides?
Rinse with fresh water, dry thoroughly, lubricate the chain lightly, and inspect metal parts for early rust.
Should I Choose An Electric Beach Cruiser Or A Pedal Only Model?
Choose electric assistance for hills, headwinds, and longer routes, and choose pedal power for simplicity and lightness.
Conclusion
Choosing and riding a beach cruiser bike rewards patience, honest route assessment, and careful fit testing. Comfort, simplicity, and coastal durability matter more than speed or flashy features for relaxed riding. Additionally, small habits like rinsing after beach rides and checking brakes regularly protect your investment beautifully.
Start by measuring your inseam, listing your regular routes, and test riding several models side by side. Compare frame materials, gearing, tire widths, and brake systems without rushing the decision process. Furthermore, involve local shops when possible, because expert fitting advice prevents costly sizing mistakes.
Take action today by visiting a local shop, scheduling test rides, and bringing this checklist along. Ride slowly, notice comfort details, and choose the cruiser that makes you smile immediately. Finally, start with short coastal rides, build confidence gradually, and enjoy relaxed cruising for many seasons ahead.
A beach cruiser bike turns every coastal trip into a relaxed, enjoyable ride. Choose a beach cruiser bike that fits your height, riding style, and local terrain. A beach cruiser bike needs little upkeep beyond cleaning, lubrication, and tire checks.
Ride a beach cruiser bike slowly along the shore and enjoy the ocean air. Every beach cruiser bike feels best with a comfortable saddle and upright handlebars. A beach cruiser bike suits riders of every age, from teens to retirees.
Test ride a beach cruiser bike before buying to check comfort and balance.